Showing posts with label dessert. Show all posts

Sunday, February 14, 2016

Cheesecake brownies

I had been so busy with things that I had no time to sit and write a blog post for a long time. But today being my blog anniversary I felt the need to update it and to thank my readers for keeping visiting the site even when I had been MIA. This dessert was a treat Aishwarya made for her Mom and Dad who couldn't decide on a single dessert. She asked us our choice of dessert she would like to make for us and I said I wanted a cheese cake and Jai wanted a brownie. So our sweet little girl as she didn't want to disappoint either one of us found this and made this. It is sweet and wonderful as our little darling!
Happy Valentine's Day and Happy Blogaversary Sugar 'N Spice!
And once again a big THANKS to all my wonderful readers!

 Cheese cake part:

Ingredients

1 packages (8oz) cream cheese (I recommend Philadelphia 1/3 less fat cream cheese)
1/2 cup sugar
2 tsp vanilla
1 large egg
Method:
Beat all filling ingredients together until well mixed and set aside.

Brownie part:

Ingredients

1 box of Ghirardelli brownie mix
1/3 cup oil
1/4 cup water
1 egg

Method:
Mix ingredients until well blended. Pour into a 9"x13" greased pan.

After you have poured the brownie batter into your greased pan, start adding spoonfuls of the cream cheese layer to about 6 points spread out on the brownie layer. Then use a knife or spoon and drag it length-wise across the pan at about four points. Next, go cross-wise in the pan about 4 times. You should start seeing the marbled pattern of brownie and cream cheese combining. Do this a few more times. Repeat till you finish all the cream cheese.

Bake at 325 degrees for 50 to 55 minutes or until a toothpick comes out mostly dry (keeping in mind that the cream cheese layer may stick a little more to the toothpick than batter).

Enjoy!

Wednesday, September 16, 2015

Triple -Layer White Cake With Orange Curd Filling And Frosting


This delicious cake is what I baked to celebrate our 15th wedding anniversary. This cake is refreshing and delicious. If you are an orange lover you are gonna love this.
Ingredients:
Frosting
3 cups Heavy whipping cream
1 tsp Orange extract
3/4 cup Powdered sugar
2 1/2 cups Orange curd I used store bought
Method:
Using both a chilled bowl and chilled beaters, beat the cream until frothy.
Add the icing sugar and extract gradually while beating.
Whip until light and a thick enough consistency to spread as an icing. Mix in 1/4 cup of orange curd to the whipped cream. If you want to stabilize the cream add 1 tsp of bloomed gelatin to it 
Use immediately.
Cake
2 3/4 cups cake flour
1 1/4 cups plus 2/3 cup sugar
3/4 teaspoon baking powder
1/2 teaspoon salt
3/4 cup vegetable oil
4 large egg yolks
6 tablespoons sour cream
1/2 cup plus 1 tablespoon whole milk
2 teaspoons grated orange peel
1 1/2 teaspoons vanilla extract
6 large egg whites

Method:
For cake:
Preheat oven to 350°F. Butter and flour three 9-inch-diameter cake pans with 1 1/2-inch-high sides. Sift flour, 1 1/4 cups sugar, baking powder, and salt into medium bowl. Whisk oil and egg yolks in large bowl until well blended. Whisk in sour cream, then milk, orange peel, and vanilla. Whisk in dry ingredients in 3 additions. Using electric mixer, beat egg whites in another large bowl until soft peaks form. Gradually add remaining 2/3 cup sugar, beating until whites are stiff but not dry; fold into batter in 4 additions. Divide batter among prepared pans.

Bake cakes until tester inserted into center comes out clean, about 20 minutes. Cool cakes in pans 5 minutes. Cut around pan sides. Turn cakes out onto racks and cool completely. Place 1 cake layer, flat side up, on 8-inch tart pan bottom or platter. Spread 1 cup curd over. Top with second cake layer, flat side down. Spread 1 cup curd over. Top with third cake layer, flat side down. Cover; refrigerate assembled cake.

Monday, August 24, 2015

Rustic Chocolate Cake


Recipe Adapted from: Food Network
This chocolate cake is sinfully moist and favorable and is easy to put together. Aishwarya  turned 14 today and she wanted a chocolate cake. As I was pretty busy today I made this chocolate cake which required very little effort. Don't be put off by its rustic look.
Ingredients
Butter, for greasing the pans
1 3/4 cups all-purpose flour, plus more for pans
2 cups sugar
3/4 cups good cocoa powder
2 teaspoons baking soda
1 teaspoon baking powder
1 teaspoon kosher salt
1 cup buttermilk, shaken
1/2 cup vegetable oil
2 extra-large eggs, at room temperature
1 teaspoon pure vanilla extract
1 cup freshly brewed hot coffee
Chocolate Buttercream, recipe follows
Chocolate Frosting:
6 ounces good semisweet chocolate
1/2 pound (2 sticks) unsalted butter, at room temperature
2 tablespoon heavy cream, at room temperature
1 teaspoon pure vanilla extract
1 1/4 cups sifted confectioners' sugar
1 tablespoon instant coffee powder
Method:

Preheat the oven to 350 degrees F. Butter two 8-inch x 2-inch round cake pans. Line with parchment paper, then butter and flour the pans.

Sift the flour, sugar, cocoa, baking soda, baking powder, and salt into the bowl of an electric mixer fitted with a paddle attachment and mix on low speed until combined. In another bowl, combine the buttermilk, oil, eggs, and vanilla. With the mixer on low speed, slowly add the wet ingredients to the dry. With mixer still on low, add the coffee and stir just to combine, scraping the bottom of the bowl with a rubber spatula. Pour the batter into the prepared pans and bake for 35 to 40 minutes, until a cake tester comes out clean. Cool in the pans for 30 minutes, then turn them out onto a cooling rack and cool completely.

Place 1 layer, flat side up, on a flat plate or cake pedestal. With a knife or offset spatula, spread the top with frosting. Place the second layer on top, rounded side up, and spread the frosting evenly on the top and sides of the cake. I decorated the cake with some m&m's and dripped on some melted chocolate

Chocolate Frosting:
Chop the chocolate and place it in a heat-proof bowl set over a pan of simmering water. Stir until just melted and set aside until cooled to room temperature.

In the bowl of an electric mixer fitted with a paddle attachment, beat the butter on medium-high speed until light yellow and fluffy, about 3 minutes. Add the cream dissolved with coffee powder after slightly warming the cream and vanilla and continue beating for 3 minutes. Turn the mixer to low, gradually add the confectioners' sugar, then beat at medium speed, scraping down the bowl as necessary, until smooth and creamy.On low speed, add the chocolate to the butter mixture and mix until blended. Don't whip! Spread immediately on the cooled cake.

Saturday, July 4, 2015

Croissant Bread Pudding

I've been MIA since my last post. Wish I could say I had reasons and had been so busy, but the truth is, I am enjoying the summer lazing around! Yesterday I was reminding Aishwarya of the consequences of not blogging regularly. She too is a blogger and has two blogs to her credit. I noticed she has not paid much attention to one of them since she started a new one almost a year ago. As I was giving her my two cents, she asked me when my last post was and how frequently I updated. Kids these days! I am still in the process of teaching her not to question her wise mom when I am trying to tell her a thing or two! But  I am sure this concept is not going to work with my know- it-all daughter in a million years. So I thought I'd better practice what I preach, so I got up from my deep slumber and here I go with my new post! If you are curious to see what Aishwarya is blogging about, hop over here.
This croissant bread pudding is a wonderful make-ahead breakfast or a delicious make-ahead dessert. I tried it first when I had a lot of left-over croissants I had to use up. Now I buy croissants at times to just make this.
Recipe Source:Ina Garten
Ingredients
7 extra-large whole eggs
5 cups half-and-half/whole milk
1 1/2 cups sugar
1 1/2 teaspoons pure vanilla extract
6 croissants, preferably stale
1 cup raisins
Method:
Preheat the oven to 350 degrees F.

In a medium bowl, whisk together the whole eggs, half-and-half, sugar, and vanilla. Set the custard mixture aside. Slice the croissants in half horizontally. In a 10 by 15 by 2 1/2-inch oval baking dish, distribute the bottoms of the sliced croissants, then add the raisins, then the tops of the croissants (brown side up), being sure the raisins are between the layers of croissants or they will burn while baking. Pour the custard over the croissants and allow to soak for 10 minutes, pressing down gently.

Place the pan in a larger one filled with 1-inch of hot water. Cover the larger pan with aluminum foil, tenting the foil so it doesn't touch the pudding. Cut a few holes in the foil to allow steam to escape. Bake for 45 minutes. Uncover and bake for 40 to 45 more minutes or until the pudding puffs up and the custard is set. Remove from the oven and cool slightly. Serve warm or at room temperature.

Monday, May 25, 2015

Strawberry Cheesecake Bites

If you are looking to satisfy your cheese cake yearnings with fewer calories this is the end of your search. This yummy delight was made for me by Aishwarya and Jai for Mother's Day.
Recipe source:The comfort of cooking
Ingredients:
1 lb. fresh strawberries, rinsed and pat dry
8 oz. cream cheese, softened
1/2 cup powdered sugar
1 teaspoon vanilla extract
Graham cracker crumbs, optional

Method:
Cut off the strawberry stems. Hollow out the strawberry and create a well for the cheese filling
 (You can also do this with a small melon baller). Cut off a small portion of the pointy strawberry tip, so that each strawberry can stand.
Whip cream cheese, sugar, and vanilla until fluffy, about 2 minutes on medium speed. Place mixture in a pastry bag and pipe into each strawberry, adding a little extra to the top. Refrigerate until thoroughly chilled.

When ready to serve sprinkle graham cracker crumbs on top of each stuffed strawberry.


TIP: Don’t make more than 5 hours in advance, or your strawberries will sweat and may become a bit soggy.

Sunday, April 19, 2015

Flourless Peanut Butter Cookies

Here is a delicious and easy peanut butter cookie. This is so delicious no one would believe that its so easy to put together.
Recipe Source: Foodnetwork.com
Ingredients
1 cup peanut butter(with no added sugar)
1 cup sugar
1 teaspoon pure vanilla extract
1 large egg, lightly beaten
1/8 to 1/4 tsp salt

Method:
Preheat the oven to 350 degrees F and place the racks in the upper and lower third of the oven.
In a medium bowl, mix the peanut butter, sugar, vanilla,salt and egg until well combined. Spoon 1 tablespoon of the mixture about 1 inch apart onto ungreased baking sheets. Flatten the mounds with the tines of a fork, making a crosshatch pattern on the cookies. Sprinkle coarse salt on top of the cookies.

Bake until golden around the edges, about 10  to 12 minutes, switching the position of the sheets halfway through baking. Transfer the cookies once cool.

In case you love cookies not so sweet reduce the sugar and replace it with some crushed roasted peanuts.

Monday, April 13, 2015

Unniyappam


It is Vishu in Kerala tomorrow. It is the celebration of New Year and it marks the Sun entering the Aries in the Zodiac.  There are a lot of regional variations of how it is celebrated in different parts of Kerala. Thrissur area where I come from, we typically have Vishukatta for breakfast, a sadya including payasam for lunch. The other highlights of the day, especially for kids is the Vishukani  and kayneettam in the morning. In my place we typically have the elders giving the younger ones money as kayneettam, wishing for a prosperous year. But what I  have heard from some of my friends from Southern Kerala is that along with the kayneettam, the kids are also given unniappam, which is also part of their Vishukkani. Hence an unniyappam recipe form me for this Vishu.

I had previously blogged another recipe for Unniyappam, but the ingredients of this are slightly different and the preparation time is a bit longer.
May this Vishu bring happiness your way.
Have a great Vishu.

Ingredients:
Sona masoori rice-1 cup
All purpose flour-1/2 cup
Jaggery/Brown sugar -1/2 to 3/4 cup
Banana-1 ripe or 2 if its small in size
Coconut-1/2 cup grated
Sesame-1 tsp
Baking soda- 1/2tsp
Salt-a pinch
Ghee- for frying
Cardamom and dried ginger powder-1/2 to 3/4 tsp
Method:
Soak rice for 3 hours,grind to a fine paste with as little water, powdered jaggery(use good quality jaggery or brown sugar) and banana.Mix in the all purpose flour, the batter should be thick as an Idlli batter or cake batter.Keep this overnight or 6 to 8 hours for fermenting. After the fermenting add rest of the ingredients except ghee and mix well. Heat an unniyappam pan and add ghee to the indention  ( you can add a few drops of sesame oil first and top it with ghee if using a nonstick pan this will prevent sticking) fill it  with ghee only half way.Now pour the batter and cook at medium heat, at about 2 minutes turn the appam and cook the for another 2 minutes till unniyappam  turns golden brown all over. Remove them and have them to your hearts content.

Monday, March 30, 2015

Pana Cotta


Here is an easy peasy Pana Cotta recipe to sweeten your sweet cravings. As the days are getting warmer this is a perfect dessert for all the busy-bees who doesn't want to compromise on taste.

Ingredients:
1  (3  oz)  package  strawberry  jello( or you can use plain gelatin and instead of water mix it with fruit juice of your choice
1/3  cup  heavy  cream
2/3  cup  plain  yogurt
3  tablespoons  sugar
1  teaspoon  unflavored  gelatin
1/4  teaspoon  clear  vanilla  extract
   
Method:

  Make  a  strawberry  jello  according  to  package  directions.  we  used  only half a  package.  Instead  of  2  cups,  I  made  1  cup  jello.  (Add  1/2  cup  boiling  water  to  1/2  package  gelatin  mix. Stir  2  minutes  or  until  dissolved,  stir  in  1/2  cup  cold  water.)   Fill  champagne  glasses  1/2  full  with  jello.  Refrigerate  for  2  hours  or  until  jello  is  set.
     
To make Panna cotta
Dissolve  1/2  teaspoon  unflavored  gelatin  in  3  teaspoons  water,  for  2  minutes  and  heat  in microwave  2  to  5  seconds.Heat  heavy  cream  and  sugar   on  low  heat  do not boil.  Add  warm gelatin  mixture  to  heavy  cream,  stir.
Stir  in  2/3  cup  yogurt  and  vanilla  extract,  mix  well  and  strain through a  fine  sieve.  let  cool.
Carefully  spoon  the  panna  cotta  over  strawberry  jello  in  each  glass. Refrigerate  glasses  until  panna  cotta  is  set,  for  about  1  hour  or  more.

Thursday, March 19, 2015

Basundi


I had been so busy lately that I didn't find time to update the blog for the past few weeks. Here is sweet dish from my drafts, which is an ideal one for you if you have some excess milk that needs to be used up.

Ingredients:
Whole Milk-4 cup
Sugar- 1/3 cup
Cashew nut-3 tbs
Cashew nut powder- 1 tbs
Almond Sliced-3tbs
Nutmeg powder-1/4 tsp
Cardamom-5 powdered
Saffron-1/2 tsp
Method:
Boil milk and when it starts to boil reduce the heat to low and add chopped or sliced cashew nuts and almonds along with saffron and nutmeg. Cook this at low heat stirring every other minute till the milk is reduced to one third. Once its reduced to one third of the original quantity add the powdered cashew along with sugar and cardamom. Stir well till well combined and cook for 3 more minutes. Refrigerate and have it cold.

Saturday, February 14, 2015

Dulce De Leche Cheesecake


Today being the Valentine's Day and the fifth blog anniversary of Sugar'N Spice, I present to you a special treat - the Dulce De Leche Cheesecake.
Dulce De Leche Cheesecake combines three delicious flavors - the saltiness and sourness of creamcheese and the sweetness of Dulce De Leche. Dulce De Leche is condensed milk made almost to a jam consistency. Dulce De Leche is commercially available under different brand names, but if you prefer to make your own from scratch, here is a recipe for that. In my recipe, I used a store bought can of Dulce De Leche.

Ingredients:
Crust:
2 1/4 cups finely crushed graham crackers
2 tablespoons granulated sugar
1/4 teaspoon ground cinnamon
10 tablespoons unsalted, melted butter
Filling:
3 (8 ounce) packages of cream cheese, room temperature
1 cup sugar
3 large eggs
1/2 cup dulce de leche
2 teaspoons vanilla extract
Glaze:
2/3 cup dulce de leche
Method:
Crust:
Preheat the oven to 350 degrees. Grease the bottom of a 9x13 inch metal baking dish. Mix graham crackers crumbs, butter, sugar and cinnamon in a medium bowl. Pour crumb mixture into the baking pan and press evenly onto the bottom of the pan. Bake for about 10 minutes, until crust is golden. Cool completely on a rack.
Filling:
Blend cream cheese and sugar until smooth and creamy with a mixer or food processor. Add eggs, one at a time, blending well between additions. Add dulce de leche and vanilla and blend well. Spread the batter evenly over the cooled crust. Bake until the center is slightly jiggly and the edges are puffed and slightly cracked. Bake about 30 to 35 minutes. Mine were done in 32 minutes, so start checking your pan at about 30 minutes to be safe. Cool completely on a wire rack.
Glaze:
Heat duce de leche in a microwave safe bowl. Heat at about 10 second intervals until melted. Stir well,  Pour it or drizzle it  over the cooled cheesecake  Refrigerate until chilled, about 1 hour.

Sunday, January 11, 2015

Kalkandu Sadam/ Pongal /Rock Crystal Sugar Rice


I am always on the lookout for an excuse for make something sweet and this weekend as I was looking for one I realized Pongal/ Sankranti is this week. Having found a reason I went ahead and started this dish. Jai was in the shower when I started with the cooking and I wanted to finish the cooking before he was out of the shower as Jai always discourages me cooking desserts, the reason being it is  not good for health. So as I was in a hurry to finish the dish and accidentally put rock salt instead of rock sugar silly me :)
I had to start over and this time around I used rock sugar. To my surprise Jai when he came out of the shower didn't say anything and as soon as it was done asked me if he can have some and even asked for seconds. I think I have managed to convert him to be a sweet lover ;)

Ingredients:
1 cup Basmati rice/ raw rice
1 cup Milk
2 cups Water
1 cup Kalkandu/ Rock crystal sugar + 1/8 cup
4 cardamoms
2 cloves
A pinch of piece of nutmeg powder
2 tbsp Ghee for frying nuts and raisins and an additional 2 tsp
1/4 cup Raisins
1/4 cup Cashew nuts
Method:
Cook the washed rice in a pressure cooker along with the milk and water for 5 minutes till the rice is well cooked. Mean while heat the ghee in a kadai and fry the raisins and Cashew nuts,till golden brown and set this aside
Powder  one  cup Kalkandu with cloves, nutmeg and cardamom,till fine. Add the Powder into the pressure cooker along with 2 tsp ghee and 1/8 cup kalkandu mix well with the rice, till kalkandu crystals are almost dissolved.
Mix the fried Cashew nuts and raisins with rice. Enjoy while still warm.

Tuesday, December 30, 2014

Brown Sugar Cupcakes with Browned Butter Cardamom Frosting

If you love Cardamom like I do you would love this cake and frosting. Today my friend visited with her two lovely daughters and I made a batch of this cupcakes for them.This was the only one that was remaining, that too because I saved one for Jai as he was not back from work yet. I think that itself tells you how good they were.
A brand new year is about to begin. Hope you are ready for more great experiences and adventures! Happy New Year to you all!
Ingredients:
1 cup loosely packed brown sugar
1 large egg
1 tablespoon cardamom powder
3/4 cup milk
1/2 cup unsalted butter, melted and cooled
1 1/2 cups all-purpose flour
1 1/2 teaspoons baking soda
1/4 teaspoon salt
Method:
Preheat oven to 350 degrees F. In a bowl, combine all the dry ingredients and mix well Set aside. Line a cupcake tin with liners.

In a large bowl, whisk brown sugar and egg until smooth. Add in milk, again mixing until combined. Slowly pour in melted butter, continuing to whisk. Add in the flour, soda and salt along with cardamom mixing with a large spoon until batter is smooth.

Using a 1/4 cup measure, add batter to liners. Bake for 16-19 minutes, or until tops are puffy and golden, and don’t jiggle when touched. Let cool completely.

Browned Butter Frosting

Ingredients:

1/2 cup butter
2 cups confectioners’ sugar
1 teaspoon cardamom Powder
1 1/2 to 2 tablespoons milk
1/8 tsp of salt

Method;

Melt butter in a small saucepan over medium low heat. Continue to cook, watching carefully, until butter becomes an amber color (watch carefully to avoid burning as butter changes from amber to burnt easily).  Remove from heat and allow to stand 2 to 3 minutes; do not stir so the solids can sink to the bottom of the pan.  Slowly pour the melted butter into a heat proof bowl, leaving the last 1 to 2 tablespoons of melted butter and the solids in the pan to discard later.  Allow the amber melted butter to set at room temperature 2 hours or until thickened and softly set.
Beat sugar and cardamom into soft, browned butter.  Add 1 tablespoon milk.  Gradually add an additional tablespoon of milk, about 1 teaspoon at a time, until of desired spreading consistency. Add the salt and mix well. Frost the cupcakes after they have cooled down completely.

Tuesday, December 23, 2014

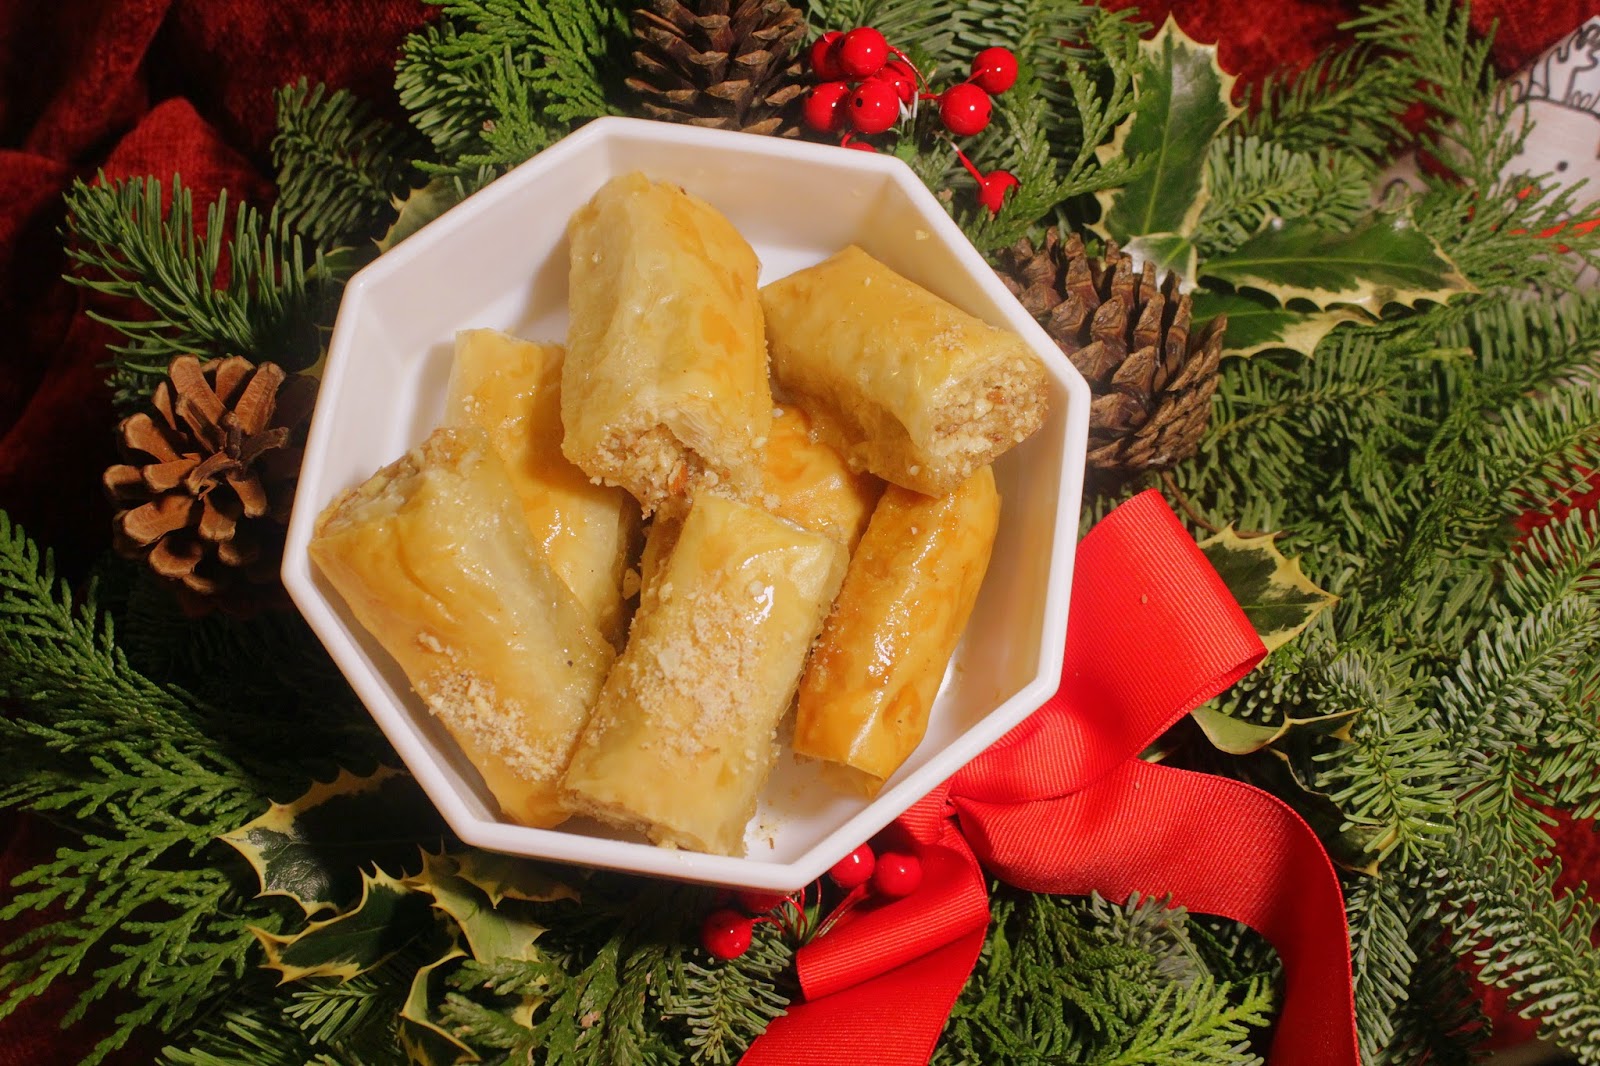
Rolled Baklava

With Christmas around the corner and also to have a treat ready for the unexpected guests who stop by,  I made these delicious Baklavas. Instead of making them the traditional way I made them into rolls . I found this easier to serve and even little ones as old as 3 could eat it with out making a mess. So if you are planning a Christmas or New years party this would be a great make ahead ( I find Baklavas to taste better a day later)  dessert.
Happy Holidays!
Ingredients:
2 cups raw (and unsalted) nuts( I used a mix of almonds,walnuts,pecans & pistachios)
1/4 cup sugar
1/2 tsp ground cardamom
1/2 tsp ground cinnamon
1/2 tsp ground nutmeg
3 whole cloves ground
1 lb. phyllo dough, thawed
6 oz. unsalted butter, melted

soaking syrup
1/2 cup sugar
1 cinnamon stick
2 2-inch slices of lemon peel
2 2-inch slices of orange peel
1/4 cup water
3/4 cup honey

Method:
 Place 2 cups of the raw and unsalted shelled nuts in the bowl of a food processor with 1/4 cup of sugar, ground cinnamon, nutmeg, cardamom, and cloves. Pulse until the mixture looks like coarse sand. Unwrap the phyllo dough and unroll so the sheets lie flat. They should be 13×17 inches. Cover with a damp cloth. Butter a 9×13 baking dish. Preheat oven to 350°F.

Set two sheets of phyllo dough on a large clean work surface and brush the sheet  with butter. Stack two more sheets of phyllo dough over the buttered folded sheet (line up the corners). Brush butter over on the stack of phyllo,

Sprinkle 1/3 cup of nut filling along the long edge of the dough stack leaving a little margin at the ends. From the nut end, tightly roll the dough up like a carpet so the nut filling is in the center of the roll. Using a sharp knife, cut the roll into equal-sized pieces . Arrange the pieces in the baking dish. Repeat until the baking dish is full. Brush butter over the baklava rolls and bake for 30-35 minutes until golden brown.

Make the syrup: While the baklava is baking, combine the sugar, cinnamon stick, lemon peel, orange peel, and water in a small saucepan over high heat. Stir to dissolve the sugar and bring to a boil. Let boil for about 15 minutes. Stir the honey into the sugar syrup and cook for another minute or two. Remove from heat. Remove the peels and cinnamon stick.

Finish the baklava: Have the syrup ready when the baklava comes out of the oven. While the baklava is still hot, pour the syrup over the pastries. Let the baklava cool completely (the syrup will pool at first, then the pastries will soak up the syrup). Sprinkle the remaing crushed nuts over the baklava. Makes approximately 35.

Sunday, December 14, 2014

Zuccotto

Yesterday was the wedding of Jai's one and only niece. She is very dear to Jai and us and we very much wanted to be part of her big day. But unfortunately, we couldn't make it to the wedding. Jai and Aishwarya were so down and disappointed; so to cheer them up I made a special dinner yesterday and to top it off I had made this chocolaty delight.
Zuccotto is an Italian chilled dessert. It can be frozen, then thawed before serving. This dessert is traditionally made in a special pumpkin-shaped mold (Zuccotto means "little pumpkin" in Italian). This is an easy and  fun dessert to make and it is good. Especially if you like chocolate  this is a dessert for you.


Ingredients:
Brownie-1 qty/ Pound cake / sponge cake  
Vanilla Ice cream - 2 cups or enough to fill the cup
Kahlua-1/4 cup
Chocolate syrup/ Nutella-4tbs/ Cocoa powder
Method:
Make brownie in a jelly roll pan, or if you want you can use a store bought pound cake or sponge cake. Line a bowl with plastic wrap. Trace the bottom of the bowl and cut it out and use it to line the bottom of the bowl.( If using a pound cake /sponge cake cut  crosswise into 1/3-inch-thick slices. Cut each slice diagonally in half, forming 2 triangles and use the triangles and line the bowl with it). Now cut long strips of brownie and line the sides of the prepared bowl. Brush some of the Kahlua over the brownie or cake lining the bowl. Reserve the extra brownie. Fill the brownie lined bowl with ice cream. Brush the remaining brownie/cake slices on one side with kahlua and arrange them, kahlua side down, over the ice cream, covering the filling completely and trimming to fit if necessary. Cover  Zuccotto with plastic wrap and refrigerate at least 3 hours and up to 1 day.
Invert the cake onto a platter. Remove the bowl and the plastic wrap.Pour slightly microwaved chocolate syrup/ nutella over or  dust with cocoa powder and serve.


Thursday, November 27, 2014

No Bake Apple Butter Pie

Hope all of you had a happy and thankful Thanksgiving.
For this Thanksgiving along with with pumpkin pie and the pecan pie, I thought of making a lighter no-bake pie.
Here is the result of my experiment. We loved this and  I am planning to make this next year too or the next time I have craving for a pie. This is an entirely home made version because I think home-made is always better as you can make it to your liking. But if you are pressed for time, you can easily put this together using store bought crust and apple butter of your choice. Apple being a fruit available year-round, this is something you can make any time of the year.
 So enjoy!

For the Pie crust:
Ingredients:
1 1/2 cups graham cracker crumbs (from about 9 whole graham crackers)
1/4 cup packed brown sugar
1/2 teaspoon cinnamon, optional
Pinch of salt
7 tablespoons unsalted butter, melted
Method:

If you’re using whole graham crackers, finely crush them in a food processor or place them in a ziploc bag and roll with a rolling pin.
Stir graham cracker crumbs, brown sugar, cinnamon, and salt together in a large bowl. Add melted butter and stir with a fork.
Press mixture  into each ramekin or serving dish  to form a even layer along the bottom. Set the prepared crusts aside while you prepare the filling. I prefer chilling the  pie crust for at least one hour before filling. Cover if chilling longer.

For the Apple Butter:
Ingredients
2 lbs of good cooking apples (we use Granny Smith or Gravenstein)
1/2 cup apple cider vinegar (or substitute with water)
1/2 cups water
Sugar (about 2 cups, see cooking instructions)
Salt
1 teaspoons cinnamon
1/4 teaspoon ground cloves
1/4 teaspoon allspice
Grated rind and juice of 1/2 lemon
1/4 cup Butter
Method:
Pressure cook cored and peeled apples along with apple cider vinegar and water for 5 minutes. Puree the apples and add rest of the ingredients into a wide thick-bottomed pot(the wider the pan the better, as there is more surface for evaporation) and cook on medium low heat, stirring constantly to prevent burning. Scrape the bottom of the pot while you stir to make sure a crust is not forming at the bottom. Cook until thick and smooth.

Final assembly:
Spoon in the apple butter to the chilled crust and smooth out the top. Serve along with a dollop of whipped cream with a sprinkle of left over cookie crumb. Or if you are not a fan of whipped cream you can leave that out and serve with just the  left over cookie crumbs.

Sunday, November 16, 2014

Glazed Pumpkin Spice Bread


These are absolutely delicious. It is one of my favorite breads to make in fall.  I have made these for the fall season for past 5  years . This spice bread is  packed with  great flavor and is very moist.
Recipe source:Tammy's Recipes
Ingredients:
2 cups sugar
1/2 cup oil
3 eggs
1 1/2 cups canned pumpkin puree
1/2 cup freshly-squeezed orange juice
Zest of 1 orange
3 cups all-purpose flour
1 1/2 teaspoons baking powder
1 teaspoon baking soda
1/2 teaspoon ground cloves
1 teaspoon ground cinnamon
1/2 teaspoon ground nutmeg
1 teaspoon salt
Glaze ingredients:
3/4 cup powdered sugar
1 1/2 teaspoons ground cinnamon
1 teaspoon water
Method:
In a medium mixing bowl, beat sugar, oil, eggs, pumpkin, orange juice, and orange zest. Set aside. In a large mixing bowl, whisk together the remaining dry ingredients. Pour mixed wet ingredients into bowl with dry ingredients, and stir until no lumps remain.
Lightly grease and flour loaf pans or muffin pans. (This recipe will fill about 8 mini loaf pans, OR 2 regular loaf pans, OR 24 muffins.) Fill pans or muffin cups 3/4 full.Bake in a pre-heated oven at 375 degrees for about 15 minutes (muffins), 20 minutes (mini loaves), or 35 to 40 minutes (regular loaves). Check with a toothpick or fork (should come out clean).
Remove bread from pans and place on a wire rack to cool, covered with a clean towel. Mix powdered sugar and cinnamon in a small bowl. Add just enough water to make a glaze. Poke tops of bread with a fork or toothpick, and drizzle the glaze over the warm bread.
Slice bread with a thin serrated knife and serve warm, or allow bread to finish cooling, and store in a sealed bag or container.
Yield:
8 mini loaves, 2 regular loaves, or 24 muffins

Sunday, November 2, 2014

Kinnathappam Malabar Style (with eggs)

Kinnathappam is a favorite of mine - especially the Thrissur version of it. The typical Thrissur kinnahtappam is made with rice flour and it is something that can be made with no planning ahead. I was initially a little hesitant to try this as this had egg also in it as an ingredient. Why go for one more ingredient when you can have yummy kinnathappams without it?
But when I served the Thrissur kinnathappam's to my friend who was visiting, she told me that though she liked it, the Malabar kinnathappam that she is used to was also nice and it was almost like a jelly and kids would surely love it, especially  if served cold after refrigerating it for a while.
I tried this during the summer and it was different as she said and tasted nice also with a different feel to it - almost like tender coconuts, or jelly like.  If you haven't tried this, and if you like jelly like, melt in the mouth desserts, it surely is worth a try.
Ingredients:
Sona Masoori Rice / Basmati rice - 1 cup (or any raw rice)
Water-1/ 2 cup
Egg-1
Coconut Milk - 2  cups (thick)
Salt - 1/4 tsp
Sugar- 1 cup
Cardamom- 4  (powdered)
Ghee - 1 tsp
Ghee roasted almonds/cashews and raisins-1/4 cup

Method:
 Soak the rice for at least 3 hours.Make the rice into a fine paste with 1 cup coconut milk ,sugar,salt  and egg using a blender or grinder.( if your blender takes a long time and usually heats up the batter use cold coconut milk) Whisk in remaining coconut milk and water Strain with a cheese cloth or a fine mesh strainer strain this one more time. Add the powdered cardamom. The consistency of the batter would be that of milk if it is too watery add some all purpose flour(maida) and if too thick add more water .
 Heat water in a steamer. In a greased  steel plate or cake pan  stir the batter well and pour the batter into the greased plate,place  in the steamer , the thickness of the batter should be 1 and 1/2 inch( I had enough batter for two). After steaming for 5 minutes add the nuts and raisins and steam for another 25-30 minutes.
 Take the pan out of the steamer and let it cool. Cut into desired shapes and serve. Repeat the same with the remaining batter to make another plate of Kinnathappam.
Makes two 9" Plates

Sunday, October 19, 2014

Gujiya / Karanji

With Diwali around the corner I wanted to post something sweet.
Karanjis are half moon shaped, fried pastries with sweet filling and with fluted ends. Though traditionally these are fried, this year I thought of making a healthier alternative since I was feeling a little guilty after feasting the last entire week celebrating my birthday.
WISHING YOU ALL A JOYFUL AND PROSPEROUS DIWALI!!
Ingredients:
Pie crust or store bought pie crust
Filling:
2 Cups - Sooji/Semolina
3/4 Cup - Mawa/Khoya (optional)
2 Cups - Powdered Sugar
1/2 tsp - Cardamom Powder
1/2 Cup - Grated Dry Coconut/Khopra (optional)
3 tbsp - Raisins
4 tbsp - Chopped Cashewnuts
2 tbsp -Almonds
Method:
Heat clarified butter in a non stick pan  ,add semolina and roast it for 5 minutes.Add chopped nuts and roast them for 5 minutes and take them out.In the same pan break the khoya into small pieces and fry till pinkish in color.In a bowl take all these fried ingredients ,mix with powdered sugar and cardamom and keep aside.
Make 15 to 20 balls from the dough.Take one ball
roll it slightly to the size of Puri and place it  in a greased gujiya or karanji mould. Place 1 tbs of filling on one side of the mould.Close the mould. Press the edges to seal gujiya well and remove excess dough portion from mould and keep it with rest of dough.make sure gujiya/karanji is sealed well, gently open mould and take out gujiya. Repeat same for rest of dough and prepare gujiya.
 If you don't have mould then roll dough and use a circle cutter or bowl to cut dough into round shape. Place filling and close gujiya forming half moon shape, press edges with a fork to seal and make impression or with hand pinch edges and seal it.
Brush gujiyas with some  melted ghee on the both sides this is optional and place  in a preheated oven 400F and bake for 18 minutes.Enjoy when cold.If you have leftovers you can store in a airtight container,and enjoy later.

Sunday, October 5, 2014

Pineapple kesari /Pineapple semolina pudding

Here is a delicious pineapple infused kesari that I made to sweeten our Navarathri  celebration. Though it is called a kesari, which means saffron, this recipe doesn't use kesari.The yellow color is ob obtained through using pureed ripe pineapple. But if you want a more vibrant yellow you can use saffron or even food color.
Ingredients:
Rava / Semolina - 1 cup 
Sugar -1&1/2 to 2 cups 
Pineapple- 1 cup 
Raisin- 1/4 cup (optional)
Cashew nuts- 1/8 cup (optional)
Ghee-1/4 cup 
Vegetable oil- 1/4 cup
Pineapple essence (Optional)- 2 drops 
Salt A pinch 
Water- 2 & 1/2 cups 

Method
Cut pineapple into fine pieces. Puree half of the pineapple into fine paste,set aside. Heat a pan with ghee and oil and if you are using cashew nuts and raisins saute them till cashew turn golden and raisins turn plump. Remove and set aside  Add the rava and roast until the raw smell goes off. 
Add hot water  to the roasted rava along with the salt.  Mix well till all the water is mixed in well
Cook covered for 4 minutes or until done in low flame. 
Add sugar and color and essence if using. Mixture will turn watery again.
Add the pineapple and the puree. Keep mixing until the kesari starts leaving its sides. Mix in the cashew and raisins if using transfer to the serving bowl.

Monday, September 15, 2014

Cream Caramel / Flan (Pressure Cooker)


Today Jai and I celebrated our 14 years of marriage. To sweeten an already sweet day I prepared
Cream Caramel / Flan in the pressure cooker. This method is faster than the oven method. Taste-wise I think both versions taste the same.

Ingredients
1 1/2 cups sugar
2 tablespoons water
1/2 lemon, juiced
2 cups heavy cream/Half &Half/Whole milk
1 vanilla bean, split and scraped
5 eggs
Pinch salt
Method:
To make the caramel: have ready a 2-quart round flan mold . Combine 1 cup of the sugar and 2 tablespoons of water in a heavy-bottomed pot or pan. Place over medium-high heat and cook until the sugar begins to melt. Swirl the pan over the heat until the syrup darkens to a medium amber color, about 10 minutes; don't stir with a spoon. Remove from the heat and immediately add the lemon juice, swirl the pan again to combine, and then pour into the flan mold. Tilt the dish so that the caramel evenly coats the bottom and a bit up the sides, place in the roasting pan and set aside.

Microwave the cream to room temperature.In a large bowl, cream together the whole eggs with the remaining 1/2 cup of sugar; add a pinch of salt. Whisk until the mixture is pale yellow and thick. Add egg mixture to cream ; Add vanilla. Pass the mixture through a strainer into a large measuring cup to ensure that the flan will be perfectly smooth. Pour the custard into the caramel-coated mold cover with an aluminum foil. Place in pressure cooker which has 2 inches of water in bottom. 
Cook for 20 minutes after the placing the whistle/weight after steam starts to escape.  If you are cooking the flan in individual cups or ramekins pressure cooking time can be reduced to 7 to 8 minutes.Let the pressure release by itself do not force release and open the cooker.

 Let the flan cool in the water bath, then refrigerate for at least 4 hours or overnight.

When you are ready to serve, run a knife around the inside of the mold to loosen the flan. Place a dessert plate on top of the flan and invert to pop it out.
Related Posts Plugin for WordPress, Blogger...