Sunday, November 13, 2011

Black Bean Soup


I prefer soups for lunch both during winter and summer. During summer, this helps us not to feel so thirsty, as with some other foods; and during winters, the warmth that a hot bowl of soup provides is unparalleled.  The black bean soup is one of my all time favorites as this is easy on your stomach yet filling enough. I got this recipe from Jay's cousin, when she threw a soup party. And ever since, this had been a staple at our house.
Adapted from How to Cook Everything by Mark Bittman - serves 4-6
Ingredients
3 tablespoons canola or olive oil
2 medium onions, chopped
2 cloves garlic, minced
1 1/2 tablespoons chili powder, or more to taste
2 15-ounce cans black beans, or 3 cups cooked from dry
4 cups chicken or vegetable stock
Juice of 1 lime, or to taste
2 Carrots
1/2 cup chopped Cilantro
1 green chilli
Sour cream or plain yogurt to garnish, or 1 egg
1/4 cup cilantro, chopped
Method:
Heat 2 tablespoons of the oil in a heavy soup pot over medium heat. Add the onions and cook until softened, about 5 minutes. Stir in the garlic green chilies, coriander leaves, and carrots and chili powder and cook, stirring constantly, for an additional minute.
Add the beans, stock, and salt and pepper to taste. Bring to a gentle boil, then simmer, stirring occasionally, for 15-20 minutes.
If using the egg, heat an additional tablespoon of oil in a non-stick skillet over medium-low heat in the meantime. Add the egg, cover, and fry slowly until the whites are completely set and the yolk is to your liking (I prefer it soft so it disperses into the soup).
To thicken the soup, purée it briefly with a stick blender, transfer half through food mill or into a blender, or just mash it by hand. Remove from the heat and add the lime juice. Adjust seasoning as necessary, garnish with cilantro and egg or yogurt or sour cream. Serve hot.

Wednesday, November 9, 2011

Homemade Pop-Tarts


There was a time in Aishwarya's life when she would only have as her school lunch, just a quarter of a pop-tarts - that too the store bought variety. She refused to have anything else. Going through the ingredients of this, I felt that I could make a better and healthier version, and this is what I ended up with.
Though her pop-tart days are over, she still take this for lunch some times, may be as a nostalgic reminder of her kindergarten days.
Recipe source: Bonappetit
Ingredients:
2 cups plus 2 tablespoons all purpose flour plus additional for shaping and rolling
1 teaspoon coarse kosher salt
1 teaspoon sugar
1 cup (2 sticks) chilled unsalted butter, cut into 1/2-inch cubes
4 tablespoons ice water
12 tablespoons of preserves, we used strawberry and cherry
granulated sugar
Method:
For a photo tutorial on how to roll, cut and fill the dough, go over  here.


Whisk 2 cups plus 2 tablespoons flour, coarse salt, and sugar in large bowl. Add butter. Using fingertips or back of fork, blend in butter until mixture resembles coarse meal. Add ice water by tablespoonfuls, tossing until moist clumps form. Gather dough into ball. Divide in half; shape each half into disk. Wrap in plastic. Chill for 1 hour.

Line 2 large rimmed baking sheets with parchment. Working with 1 disk at a time, roll out dough on floured surface to about 13x11 inches. Trim to 12x10-inch rectangle, then cut into eight 5x3-inch rectangles.

Arrange 4 rectangles, spaced apart, on each sheet. Spoon 1 1/2 tablespoons preserves in row down center of each rectangle. Top preserves with second dough rectangle. Using fingertips, gently press all edges of each tart to seal; press all edges with tines of fork to double-seal. Using toothpick, poke a few holes in center of top dough rectangle.I love to sprinkle some granulated sugar on top of the tarts. Cover; freeze tarts on sheets at least 2 hours or for up to 1 week.

Position 1 rack in top third and 1 rack in bottom third of oven and preheat to 375°F. Bake frozen tarts uncovered until golden, reversing sheets after 15 minutes, 25 to 30 minutes total (some preserves may leak out). Immediately transfer tarts to rack. Serve warm or at room temperature.

Sunday, November 6, 2011

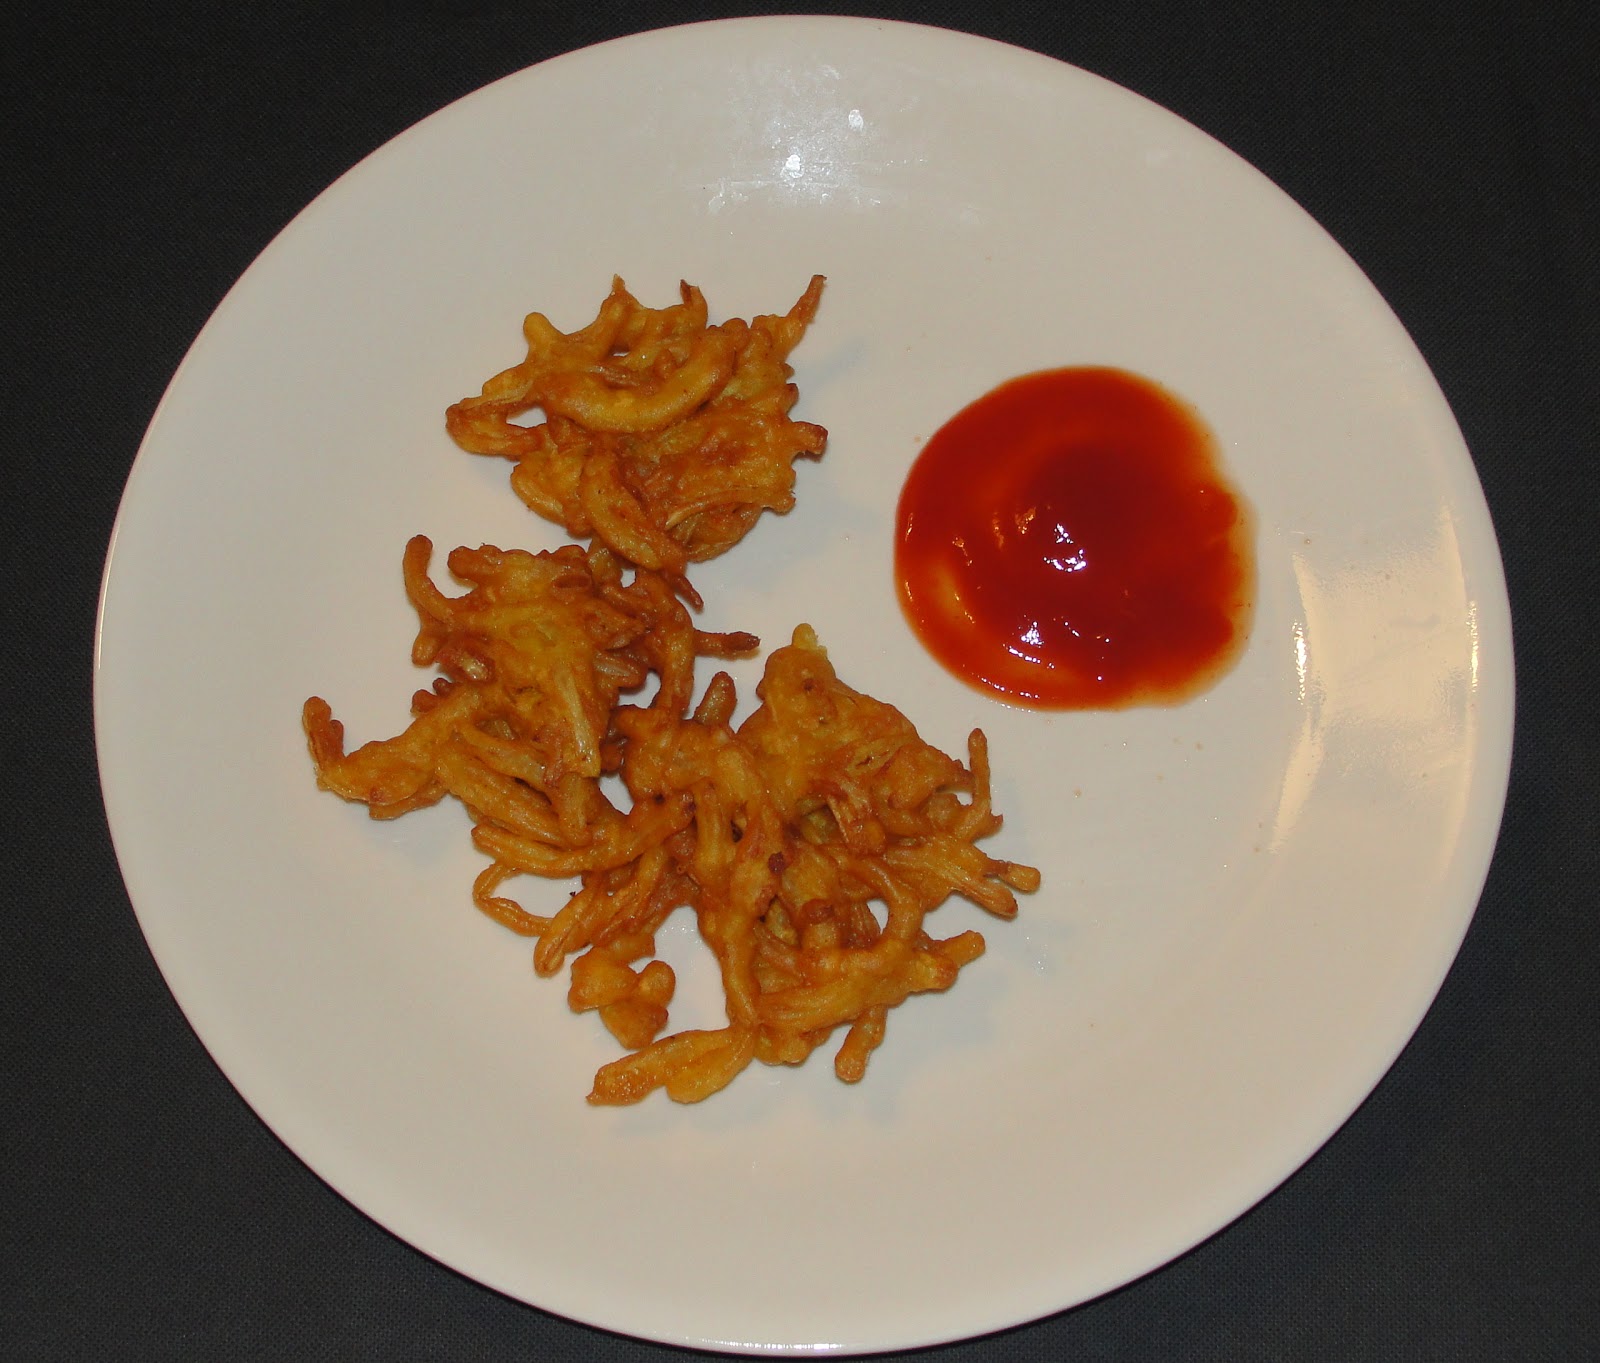
Onion Bhaji / Onion Pakora


Onion Bhaji or Onion pakora is the Indian version of the onion rings. These are typically served as starters or as evening snack as an accompaniment to the Indian tea or coffee service. If you are thinking of trying this out, I would recommend trying it out on a cold or rainy day, as these can really lift your spirits up. Best to serve it hot, fresh out of the frying pan. While I was making it for this post, we finished the bulk of it by the time I could even click a photo...

Ingredients
Big Onion-4
Chick pea Flour/Gram flour-1  cup
Rice Flour-2tbsp
Chilly Powder- 3/4 tsp to 1tsp
Turmeric Powder-1/4tsp
Asafoetida powder-1/4 tsp
Salt- to taste
Baking Soda- a pinch (opt)
Water- as required
Method:
Cut the onion into fine slices.In a bowl mix chick pea flour,chilly powder,turmeric ,salt,asafoetida powder,rice flour,baking soda and  enough  water to make a batter the consistency of pancake batter . Heat oil in a pan for deep frying.Add the onion slices to the batter, coat them with the batter .Now drop the coated  onion in small portions in batches  into the  hot oil carefully once the oil  is around 180 C.Deep fry them till golden.  Remove from the oil and drain. Serve the hot pakoda  with  tomato sauce or your favourite dip.

Wednesday, November 2, 2011

Thick & Chewy Chocolate Chip Cookies


For this weeks Blog hop Wednesday by Radhika  Iam paired with Vidya ,those of you who haven't been to her space need to take a look of her wonderful space. She has tempting dishes all so presented well and to top that  her  photography is great. I choose this cookie recipe as I had been on the look out for a perfect bakery style chocolate chip cookie and I was well pleased with the outcome.
Ingredients
All purpose flour-2 cups+2 tbsp
Baking soda- 1/2 tsp
Salt-1/2 tsp
Butter- 12 tbsp
Brown sugar-1 cup(packed)
Granulated sugar-1/2 cup
Egg- 1 large +1 yolk
vanilla essence-2 tsp
Chocolate chips- 1 to 1 1/2 cups
Method
Preheat the oven to 325 deg F.
Line the baking tray with parchment paper or lightly grease the tray.
Whisk flour,baking soda and salt together until combined,keep aside.
Beat butter and both the sugars together until combined.
Beat in the egg,yolk and vanilla essence .Now add the dry ingredients and mix well.
Now add the chocolate chips.
Measure almost 1/4 cup of dough and roll into a ball.Using your fingers split the ball into two.
Place the dough halves on the prepared baking tray ,with the uneven surface facing up.Place each dough halves  2 1/2  inch apart.
Bake until it turns light brown and edges begin to become crisp for about 15 to 20 minutes.
Allow the cookies to cool completely before removing.
Sending this over to Blog Hop Wednesday
Related Posts Plugin for WordPress, Blogger...